Motivation
As we entered 2020, one of my resolutions was to start playing and practicing guitar again - something I’ve done off and on for the last 5 years. It went how most other resolutions do, with lackluster results for a couple of months. That is, until my area enacted a stay at home order during the COVID-19 pandemic. The change to my everyday routine was the perfect catalyst for a rekindled interest in my old hobbies!
Fast forward 1.5 months, and I’ve come into possession of numerous effects pedals. When I started looking at pedalboard options, I felt that almost all pedalboards were out of my budget. I’m no professional musician, and I don’t need premium gear just to hold all my pedals together. At the same time, the cheap options seemed to be of pretty poor quality. With my access to some scrap aluminum extrusions, CAD software, and 3D printers, this was a great opportunity to craft a pedalboard to fit my own specs.

The completed build. The signal chain is: Boss TU-3 Tuner > DOD Compressor 280 > DOD Overdrive Preamp 250 > Joyo Sweet Baby Overdrive > DOD Phasor 201 > Boss DD-6 Digital Delay > TC Electronics Skysurfer Reverb > Boss RC-1 Looper
Process
My first prototype was small, wide enough to hold just a few pedals. I wanted to test the spacing of the 2040 extrusions. Is it strong enough to hold not just the pedals, but the weight of me stomping the switches? Is there ample room for patch and PSU cabling? Will the pedals sit properly on top? My results were very promising. It was sturdy, I felt the pedals sat at a comfortable height and angle for me to switch them on and off, and the little board made it very easy to move everything together. I did have one issue - there wasn’t a good place to mount the PSU.

Simple prototype built from some scrap extrusions
On my next design, I piggybacked the height and angle dimensions off of existing pedalboards, adjusting the bracket sizing accordingly. I found some pre-cut 500mm black anodized extrusions from a local hardware supplier which I thought looked a lot nicer than the clear anodized look (it really matches the black stage gear aesthetic). I was very happy with the extra room afforded by this build, and it wasn’t any more complex than my prototype.

Starting my build. The printed brackets are made with white granite PLA from Push Plastic.

The assembled pedalboard. Nice black extrusions sourced locally.

Top view

Corner view
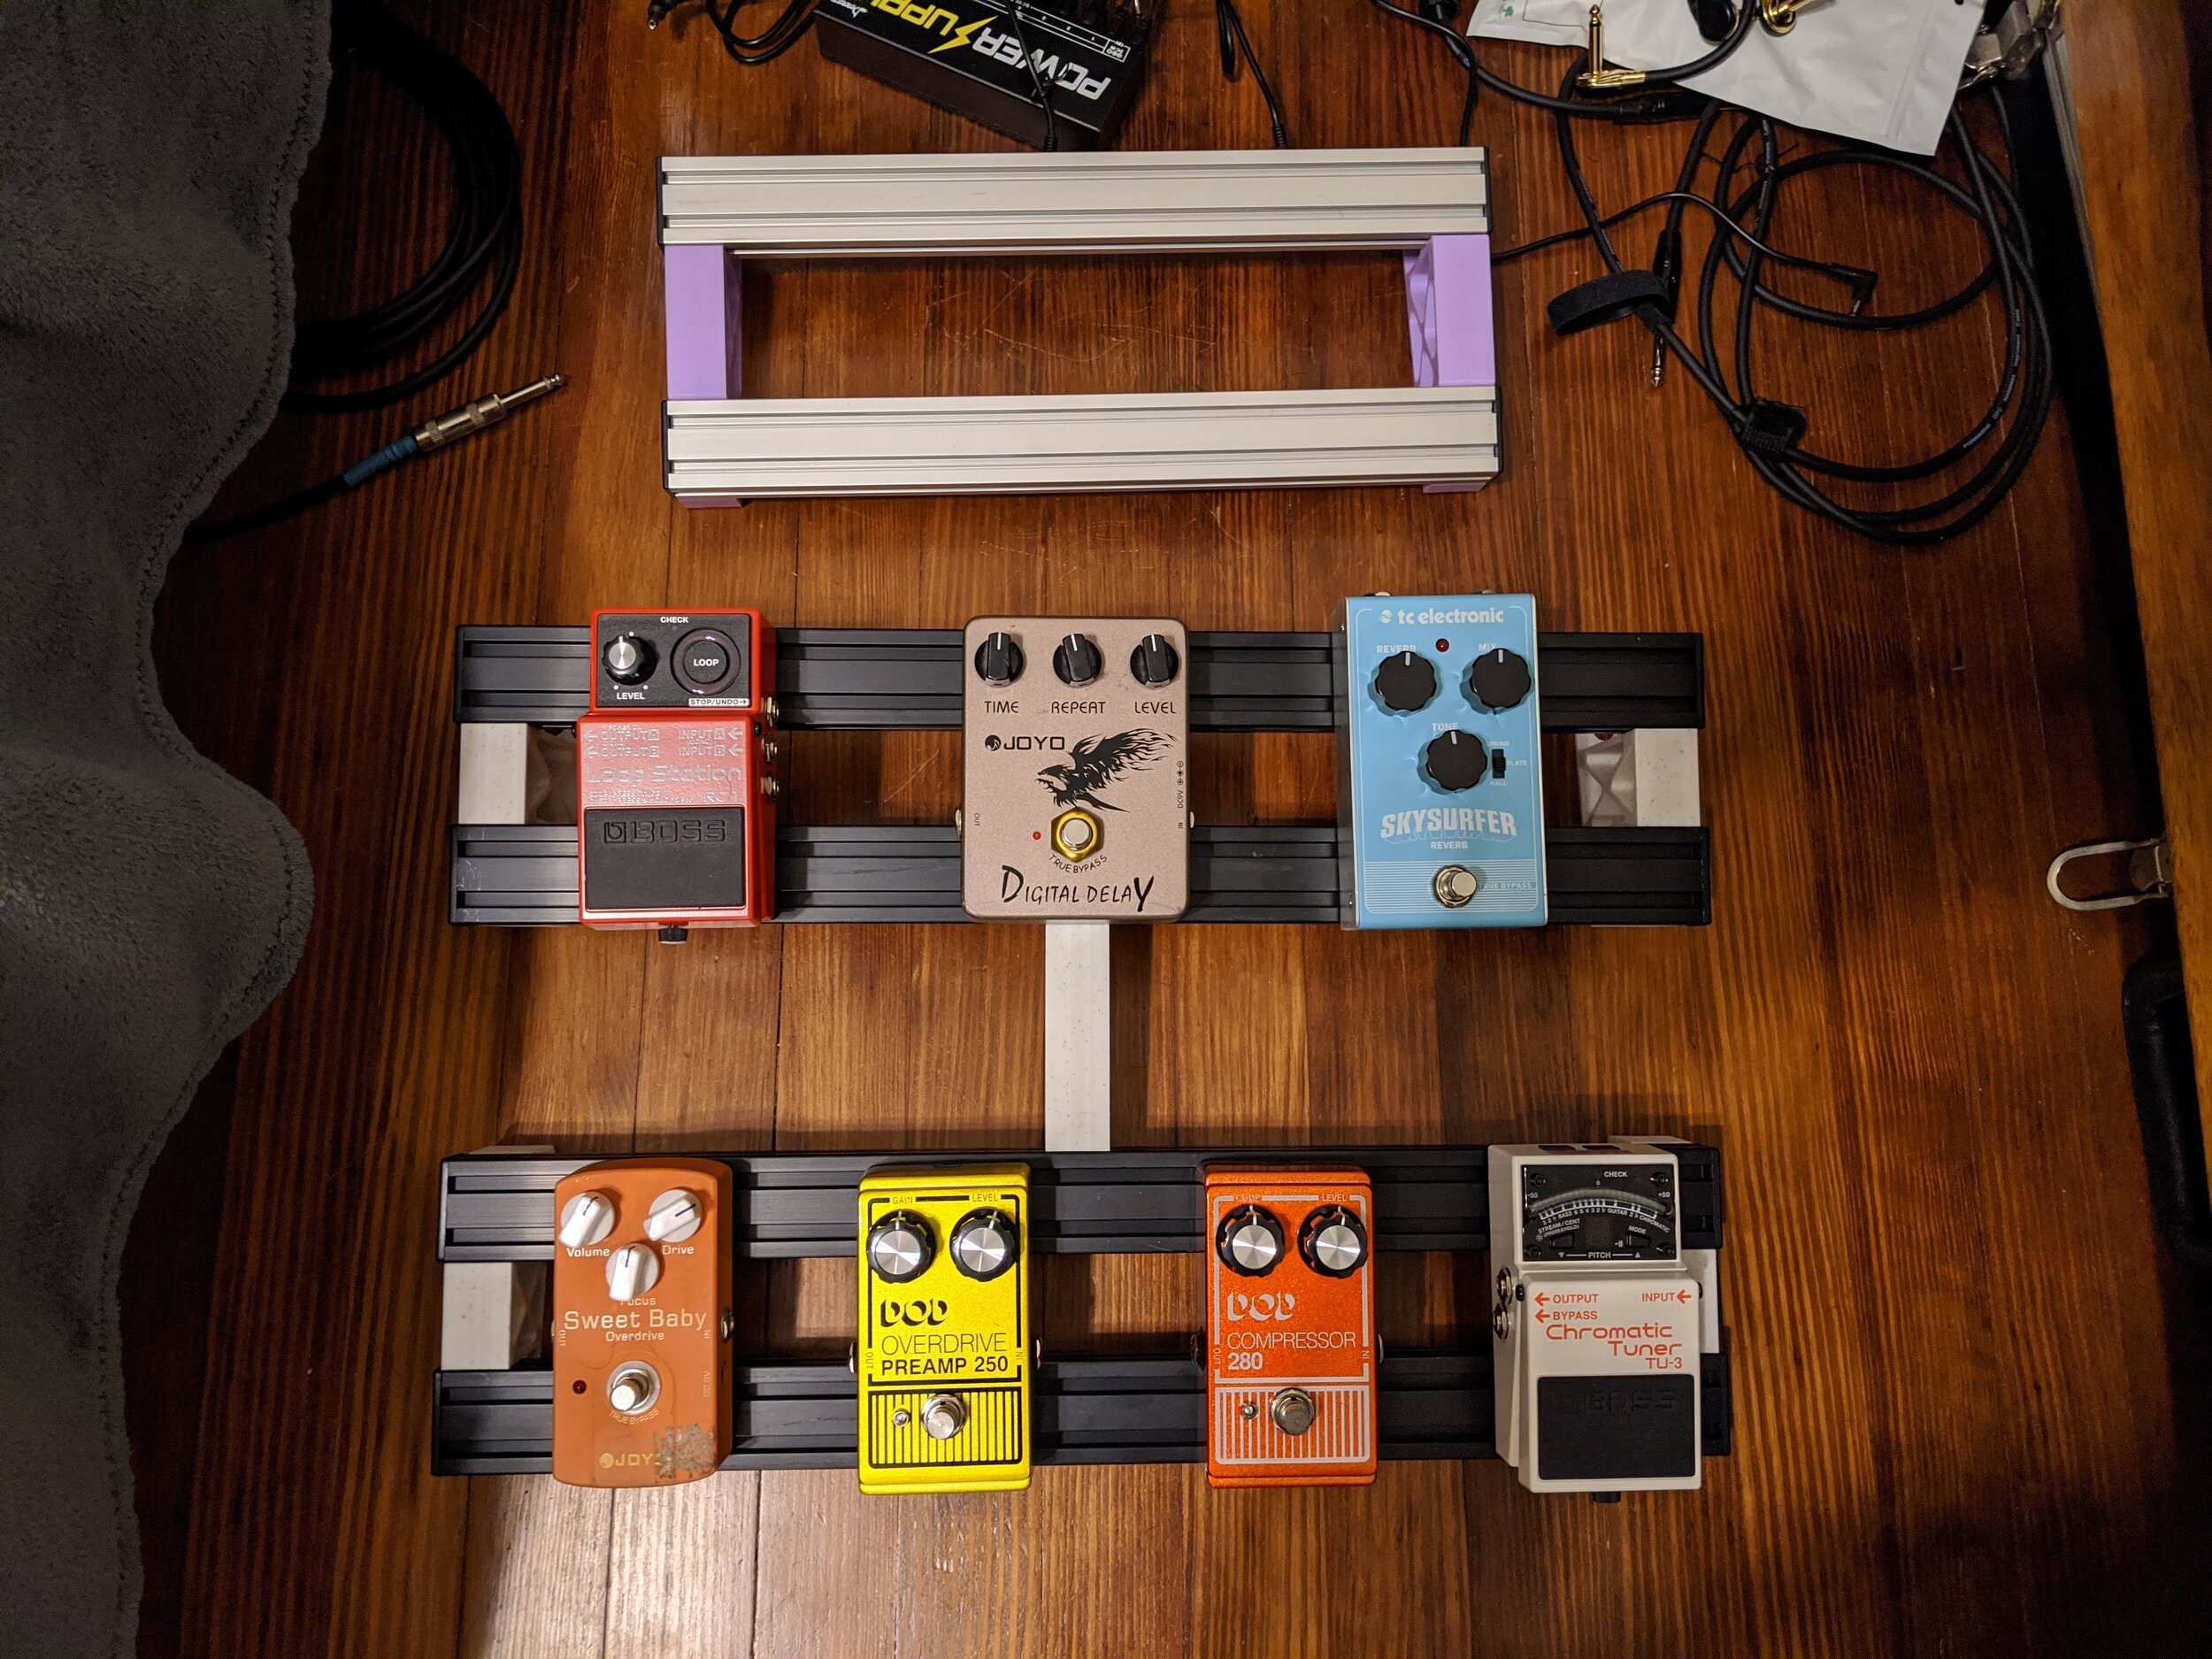
Experimenting with pedal layout and comparing the new pedalboard with my prototype. So much more room!

My pedalboard after adding 3M Dual Lock and doing some wire routing. I was not happy with the way the patch cable went diagonally from the Sweet Baby to the Phasor 201, and ended up replacing it with a longer cable that was easier to route.
Once it was assembled, pedals and all, I did notice that the single center brace was having trouble securing the top and bottom halves together. Adding a second brace in the center really stiffened everything up. From there, I applied 3M Dual Lock to hold all the pedals down and even found space underneath for the PSU. Using some velcro ties, it was really easy to tidy up the wiring as well. Things really came together well! From there, all that was left to do was turn it on and jam out.
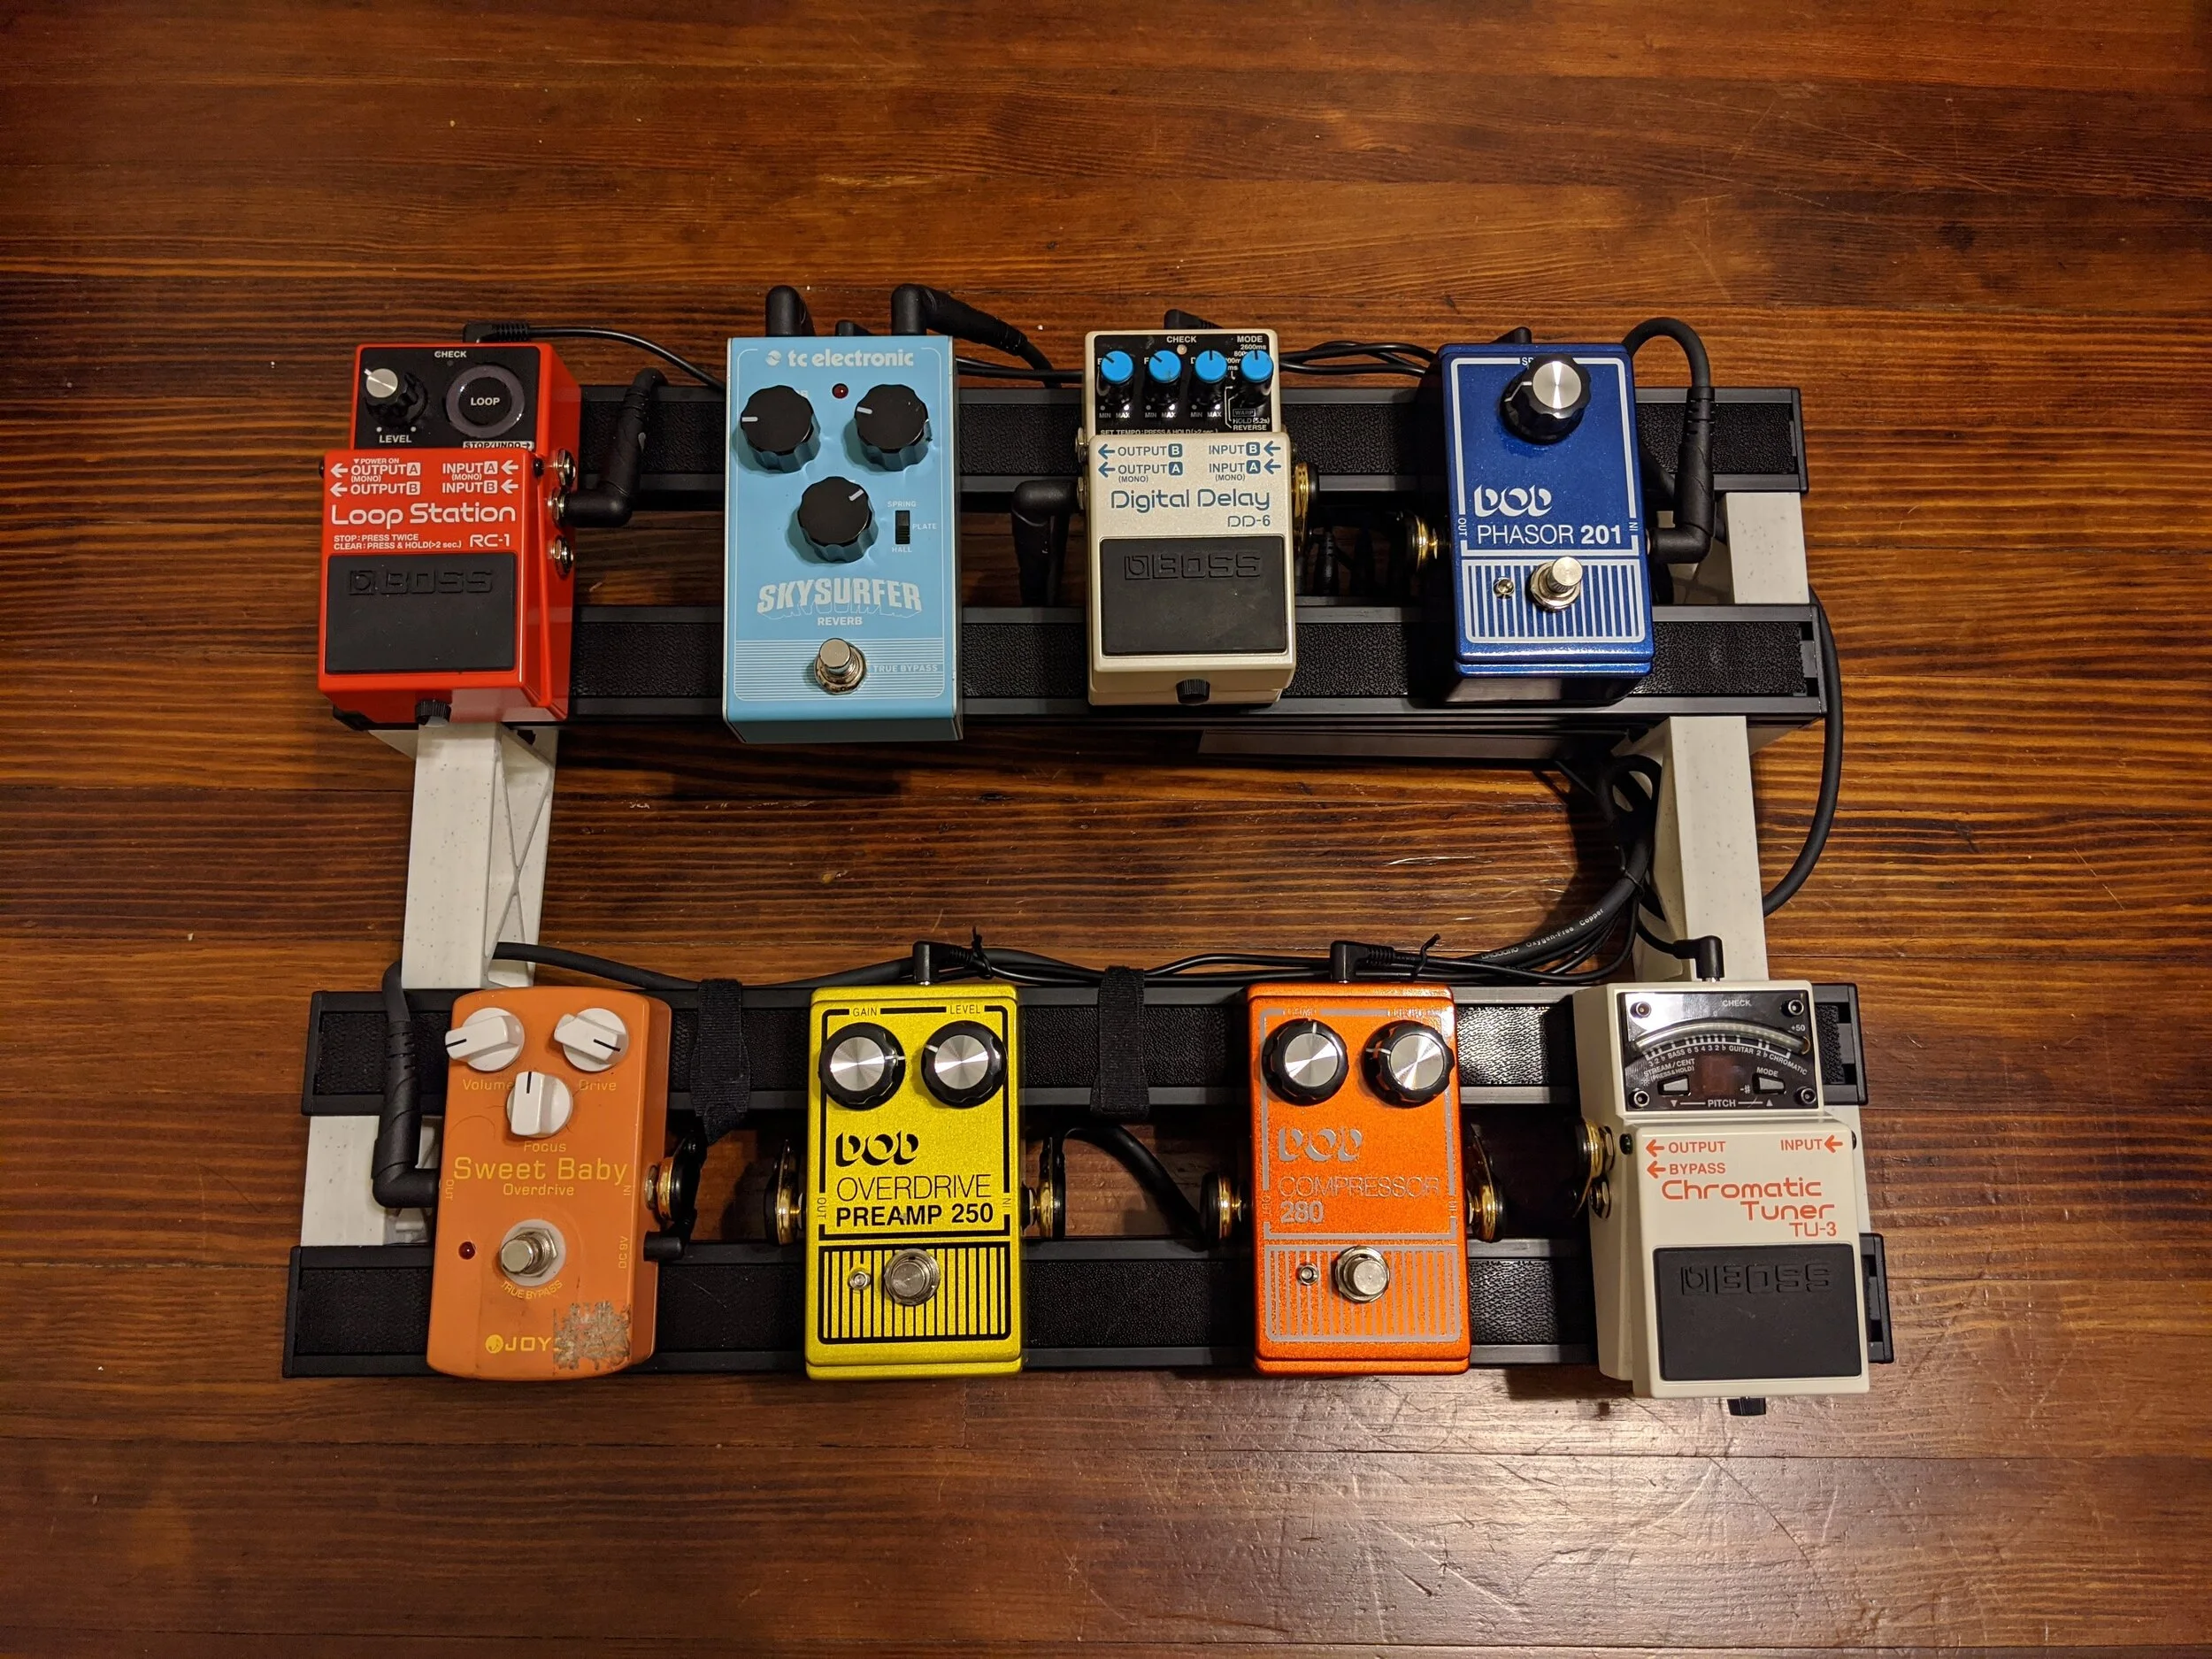
The modified pedalboard with extra bracketry and longer corner-to-corner patch cable. It’s looking really good!
Conclusion
In the end, my second build ended up being very sturdy and spacious. I currently use 8 pedals on it, but I could definitely fit more on if needed, and depending on the size. It’s very nice to use in my everyday playing and (post-pandemic, someday) I think it will be very easy to transport to jams as well. Overall I’m pretty satisfied with how it turned out! If you’d like to try this build out yourself, you can find the STL files on Thingiverse. You can use whatever lengths of 2040 extrusion to fit your needs. From there you just need the proper amount of M5 T-nuts and M5 x 8 fasteners. Good luck, and rock on!